
Paymaster CLI Example
This example expands on the Quickstart Example to sponsor gas fees using ERC-4337 and Stackup's Paymaster API.
If you just completed the Quickstart CLI Example, you can skip to step 4.
1. Download
Clone the ERC-4337 Examples repository to download the scripts.
git clone https://github.com/stackup-wallet/erc-4337-examples.git
2. Install
This example uses the userop.js package. Install it, and all other dependencies.
yarn install
3. Initialize your configuration
You can now initialize your local configuration.
yarn run init
A config.json file will be created. The file will look like this:
{
  "rpcUrl": "https://api.stackup.sh/v1/node/API_KEY",
  "signingKey": "0x876d6e83487dc265a65066449b6fce5a1edfddfb0d67b71df8a9306c5324f192",
  "entryPoint": "0x5FF137D4b0FDCD49DcA30c7CF57E578a026d2789",
  "simpleAccountFactory": "0x9406Cc6185a346906296840746125a0E44976454",
  "paymaster": {
    "rpcUrl": "https://api.stackup.sh/v1/paymaster/API_KEY",
    "context": {}
  }
}
Anatomy of the config.json file
| Key | Value |
|---|---|
rpcUrl | URL of an ERC-4337 bundler and node |
signingKey | Private key that can sign transactions for the smart contract account |
entryPoint | Address of the Entry Point contract |
simpleAccountFactory | Address of the factory that will create the account |
paymaster | URL of the paymaster service you are using and context (optional). It has two fields: rpcUrl and context. rpcUrl is the JSON RPC url of the paymaster, and context specifies the type of paymaster and any relevant data. You can read more about the Paymaster RPC methods here. |
In this example you will need to set the bundlerUrl and paymaster fields.
Get rpcUrl
rpcUrlYou can create a free bundler instance at app.stackup.sh.
Create an account and select the Polygon Mumbai network for the instance and ensure the version is set to 0.6.0. Once the instance is created, click on the copy icon to open a small dialog. Copy the node URL and the paymaster URLs, and paste them into the config.json file.

Paymaster context
Now you need to set the context field of the paymaster. For this example, we will just sponsor the transactions. Set the context to { "type": "payg" } to specify that you will use Stackup's "pay-as-you-go" paymaster.
Your configuration file should now look like this:
{
  "rpcUrl": "https://api.stackup.sh/v1/node/API_KEY",
  "signingKey": "0x876d6e83487dc265a65066449b6fce5a1edfddfb0d67b71df8a9306c5324f192",
  "entryPoint": "0x5FF137D4b0FDCD49DcA30c7CF57E578a026d2789",
  "simpleAccountFactory": "0x9406Cc6185a346906296840746125a0E44976454",
  "paymaster": {
    "rpcUrl": "https://api.stackup.sh/v1/paymaster/API_KEY",
    "context": { "type": "payg" }
  }
}
5. Create an account
Create an account using the factory simpleAccountFactory defined in the configuration file.
yarn run simpleAccount address
An address will be returned. At this point, the smart contract account has not been deployed. ERC-4337 account addresses are deterministic, so you don't need to deploy the contract to know its address.
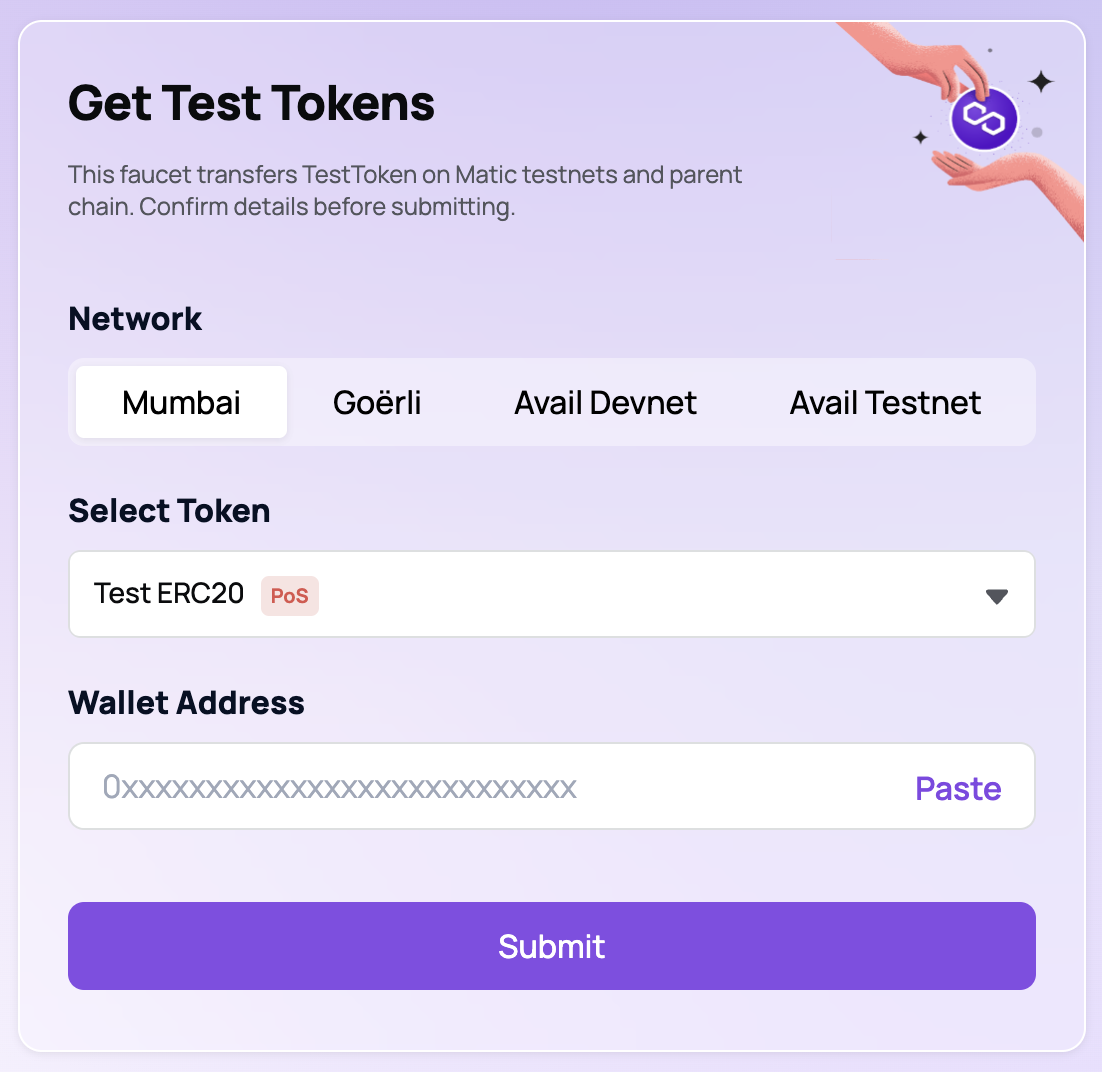
6. Fund the account with ERC-20 tokens
To demonstrate that the transaction is completely gasless, we will fund the account using only ERC-20 tokens. Navigate to a faucet like https://faucet.polygon.technology and claim test ERC-20 tokens. Select the Mumbai network, Test ERC20 (PoS), and paste your wallet address from step 5 before clicking Submit.
7. Check your subscription
To sponsor a transaction, even on testnets, you will need to upgrade to the Developer plan in your Stackup dashboard.
8. Send a sponsored transaction
The simpleAccount erc20Transfer command allows you to transfer ETH from the smart contract account to any address. It will create a user operation, sign it, and send it to the bundler.
This is its structure:
yarn run simpleAccount erc20Transfer \
     --token <address> \
     --to <address> \
     --amount <decimal> \
     --withPaymaster
Set the --token address to the address of the ERC-20 token. You can get this address by searching for your smart contract account address from step 4 in a block explorer like polygonscan. The --to address is the address you will send the token to, and --amount is the number of ERC-20 tokens you want to transfer.
For testing, you can set the --to address to the address of your own smart contract account and --amount to a very small number.
Once the transaction is sent, you can see it in a block explorer.
9. Pay gas with ERC-20 token
You can also accept ERC-20 tokens for gas payment.
This example will take you step-by-step through funding an account with an ERC-20 token, approving the paymaster to withdraw the token, and sending a transaction. In practice these can be bundled into a single action for the end user.
Set ERC-20 Paymaster
To use Stackup's ERC-20 token paymaster, you will need to open the config.json file and change the paymaster context field:
{
  "rpcUrl": "https://api.stackup.sh/v1/node/API_KEY",
  "signingKey": "0x876d6e83487dc265a65066449b6fce5a1edfddfb0d67b71df8a9306c5324f192",
  "entryPoint": "0x5FF137D4b0FDCD49DcA30c7CF57E578a026d2789",
  "simpleAccountFactory": "0x9406Cc6185a346906296840746125a0E44976454",
  "paymaster": {
    "rpcUrl": "https://api.stackup.sh/v1/paymaster/API_KEY",
    "context": {
      "type": "erc20token",
      "token": "0x3870419Ba2BBf0127060bCB37f69A1b1C090992B"
    }
  }
}
The type is now "erc20token" and an extra field token is added with the token address. For now, Stackup's paymaster only accepts USDC on mainnets and a special testnet token on testnets. The address 0x3870419Ba2BBf0127060bCB37f69A1b1C090992B is the testnet token address.
Claim Test Paymaster Tokens
There is no Stackup paymaster token faucet yet, so you will need to claim the token manually.
Using a block explorer like polygonscan, navigate to the testnet token contract page. Click Write Contract, connect an EOA wallet with MATIC in it, and mint testnet tokens.
Set the "to (address)" to the Smart Account address you received in step 5, and "amount (uint256)" to 1000000 to specify 1.000000 ERC-20 token. Click Write and approve the transaction in your EOA wallet.

This will send ERC-20 tokens to your Smart Account.
Approve Paymaster Withdrawal
The Smart Account must send a transaction allowing the Paymaster to withdraw the paymaster ERC-20 tokens from the account. Luckily, this transaction can itself be paid for using the ERC-20 token paymaster!
To approve the withdrawal, use the following command in your terminal:
yarn run simpleAccount erc20Approve \
    --token <token address> \
    --spender <paymaster address> \
    --amount <decimal> \
    --withPaymaster
Where the --token flag specifies the ERC-20 token address, the --spender flag specifies the paymaster address, --amount sets the token amount in decimals, and --withPaymaster specifies that you will use the paymaster to pay gas for the transaction.
For this example let's approve the paymaster to withdraw up to 1 test token. On Mumbai, this would be:
yarn run simpleAccount erc20Approve \
    --token 0x3870419Ba2BBf0127060bCB37f69A1b1C090992B \
    --spender 0x9D6AC51b972544251Fcc0F2902e633E3f9BD3f29 \
    --amount 1000 \
    --withPaymaster
You can find the paymaster address for other networks on the Entity Addresses page.
The paymaster can now withdraw ERC-20 tokens from your Smart Account to pay for gas fees. In fact, it withdrew ERC-20 tokens to pay the gas fees for the approval transaction itself 🤯
Send ERC-20 Tokens
You can now send UserOperations paid for in ERC-20 tokens. To send an ERC-20 token, simply use the erc20transfer command with the --withPaymaster flag.
yarn run simpleAccount erc20Transfer \
    --token 0x3870419Ba2BBf0127060bCB37f69A1b1C090992B \
    --to <address> \
    --amount 0.0001 \
    --withPaymaster
Troubleshooting
Here are some error codes you may experience if you are using the quickstart example repository and a paymaster:
invalid userOp or paymaster signaturemeans that signature verification failed. While using a paymaster, this usually means that the user operation has changed after the paymasterAndData or signature fields have been set. Make sure nothing changes between paymaster approval and signing.paymaster: not enough deposit to cover max prefundmeans that the Paymaster contract does not have enough funds deposited with the Entry Point. If this occurs while using Stackup's paymaster, please contact us immediately in Discord by tagging @Stackup Team or email [email protected].AA21 didn't pay prefundis an error from the bundler that indicates that the account does not have enough funds. If you intended to use a paymaster, this usually means that the--withPaymasterflag was not set so thepaymasterAndDatafield of the user operation was empty when it was sent to the bundler.400 bad request: invalid tracer valueorThis method is not whitelistedare responses that you may get if you are running your own bundler locally and using an external node provider. Most node providers do not support the custom tracing that bundlers need. Either run your own local node or use Stackup's bundler service.entryPoint: Implementation not supportedmeans that the bundler being used for the transaction does not support the selected Entry Point. If you are using a Stackup bundler, we recommend setting your bundler to the latest version in the Stackup dashboard and settingentryPointin the config.json file to the canonical Entry Point contract.
Updated about 1 year ago