
Branch RPG
BranchRPG is an example app to showcase smart account features for a web3 game
What you'll learn
BranchRPG is an example app to showcase smart account features for a web3 game. This game will showcase how to:
- Initialize a smart account
- Build a user operation
- Sponsor a user operation
① Open the template
Clone the example repository from Github. This contains the game with assets built in, but without any ERC-4337 parts.
git clone -b tutorial-start https://github.com/stackup-wallet/branch-rpg.git
cd branch-rpg
You'll also need to install the dependencies. Make sure you are using Node v14.
npm install
② Set the environment
Copy the .env.example file to .env.
cp .env.example .env
Open it up, and fill out the NODE_RPC_URL and PAYMASTER_RPC_URL. You can get these URLs from your Stackup dashboard by clicking the big blue button. Select Polygon Mumbai.
NODE_RPC_URL="https://api.stackup.sh/v1/node/API_KEY"
PAYMASTER_RPC_URL="https://api.stackup.sh/v1/paymaster/API_KEY"
③ Run the game
npm run dev
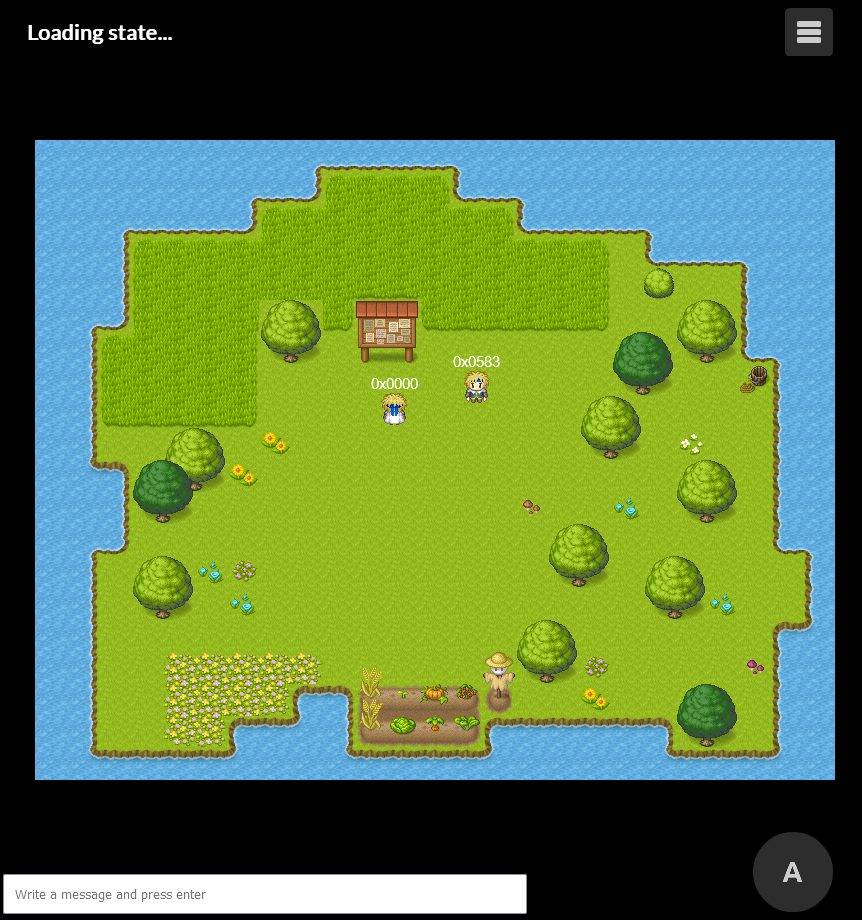
Use the space bar to move through each of the messages, then WASD to move to the bulletin board. At the bulletin board, press ENTER.
Because you don't have any ERC-4337 stuff hooked up yet, the player's address will be 0x0000 and the game's score won't load. Don't worry though! We will add them now.
④ Create a User Operation
Open src/modules/web3/client/store.ts. This is a file that handles tasks the user performs.
Find the init function and the comment INITIALIZE USER OPERATION HERE. This is where you'll add the next few lines of code.
Connect to a client
First you will need a client to connect to the ERC-4337 bundler network. Immediately under the INITIALIZE USER OPERATION HERE create the client.
client = await Client.init(process.env.NODE_RPC_URL || "");
Specify the paymaster
You will also need a paymaster to sponsor the User Operation.
The userop.js library has some middleware that can handle the logic of requesting a signature from the paymaster.
const paymasterMiddleware = process.env.PAYMASTER_RPC_URL
  ? Presets.Middleware.verifyingPaymaster(process.env.PAYMASTER_RPC_URL, {
    type: "payg",
  })
  : undefined;
Create the builder
Next we will create a User Operation builder, userOpBuilder. This builder has a bunch of functions for filling out the various fields of the User Operation with sensible defaults.
The game will use a Kernel smart account. The preset in userop.js has the interfaces built into it, so just use it.
userOpBuilder = await Presets.Builder.Kernel.init(
  new ethers.Wallet(signer),
  process.env.NODE_RPC_URL || "",
  { paymasterMiddleware }
);
This sets an ethers.js Signer object to own the account, a URL to connect to the ERC-43337 bundler, and any other options you want to specify upfront. In this case, you will tell it to use the paymasterMiddleware.
⑤ Add the callData
The callData of a User Operation contains the instructions that will be executed on-chain. In this step, we'll create the callData.
Add the contract interface
All contract interactions will take place with an ERC-20 token contract.
At the top of the store.ts file, find the comment CONTRACT INTERFACE HERE. Immediately below that comment, create the interface to the contract, BranchRPGContract.
//
// >>>>>>> CONTRACT INTERFACE HERE <<<<<<<
//

const BranchRPGAddress = "0x20d8aE1faAFc55c8e2f1e86D02a62C79D9A43a73";
const BranchRPGContract = new ethers.Contract(
  BranchRPGAddress,
  abi,
  new ethers.providers.JsonRpcProvider(process.env.NODE_RPC_URL)
);
Add mint and burn calls
Now that you have the contract interface, you can start creating the calls. There are two actions that need to take place:
- "water": mints an ERC-20 token
- "garden": (burns an ERC-20 token)
We'll create an onTask function that will add the calls to the callData each time the player interacts with the bucket or garden.
Each call is an object containing the target contract to, the native token value to send value, and the contract data data:
const onTask = (store: IStore) => (data: ITaskData) => {
  switch (data.action) {
    case "water": {
      const call: ICall = {
        to: BranchRPGAddress,
        value: ethers.constants.Zero,
        data: BranchRPGContract.interface.encodeFunctionData("mint", [
          store.address,
          ethers.constants.WeiPerEther,
        ]),
      };
      store.calls = [...store.calls, call];
      break;
    }

    case "garden": {
      const call: ICall = {
        to: BranchRPGAddress,
        value: ethers.constants.Zero,
        data: BranchRPGContract.interface.encodeFunctionData("burn", [
          ethers.constants.WeiPerEther,
        ]),
      };
      store.calls = [...store.calls, call];
      break;
    }

    default:
      break;
  }
};
Display score
Additionally, we want the player to see how many times the garden has been watered. Just add this after onTask.
const onScore = (store: IStore) => async () => {
  store.score = ethers.utils.formatEther(await BranchRPGContract.score());
  store.waterBalance = ethers.utils.formatEther(await BranchRPGContract.balanceOf(store.address));
};
Handle mint and burn events
Go back to the init function, just after defining the userOpBuilder. Add calls to the onTask and onScore functions.
const score = await BranchRPGContract.score();

this.score = ethers.utils.formatEther(score);
this.address = userOpBuilder.getSender();
this.signer = signer;

const BranchRPCBurnFilter = BranchRPGContract.filters.Transfer(
  null,
  ethers.constants.AddressZero
);
BranchRPGContract.on(BranchRPCBurnFilter, onScore(this));

socket.on("task", onTask(this));
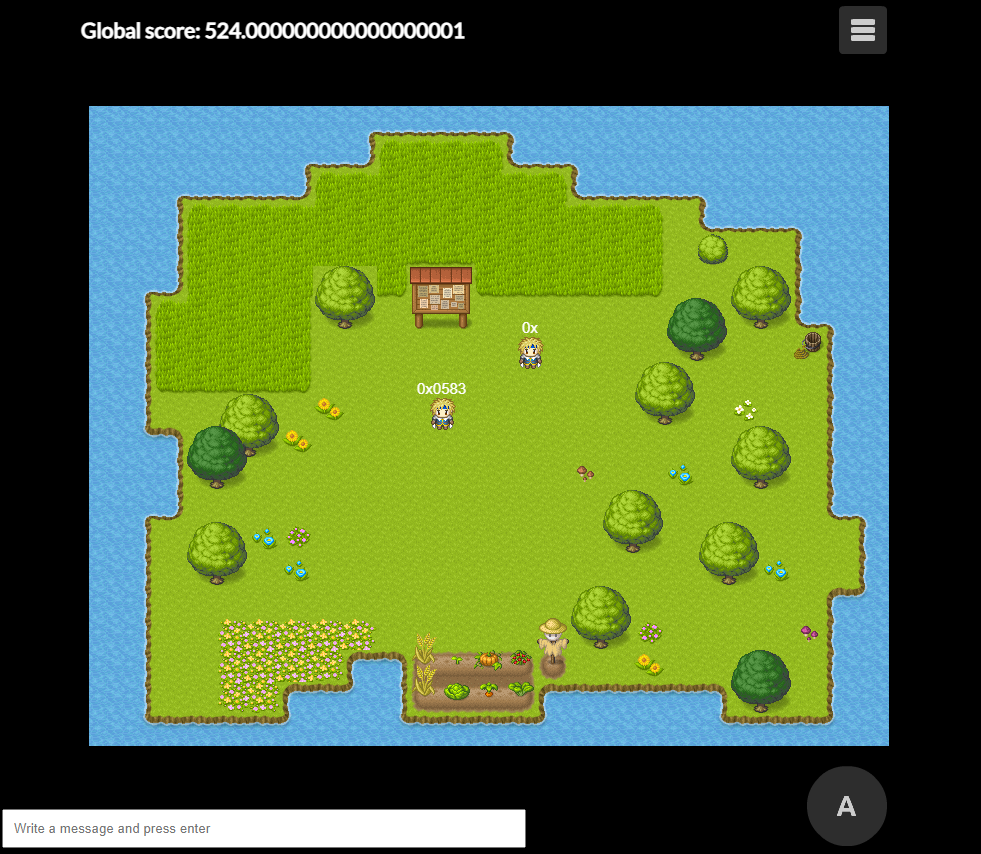
If you go back to the game and refresh, you'll see that you can see the score and your player has a non-zero address. Hooray!
You can now start collecting water and watering the garden, but when you go to the scarecrow nothing will happen. We need to send the User Operation to the client.
⑥ Execute User Operation
The execute function will be called when the player talks with the scarecrow. This will take the User Operation and send it to the client.
Go to the execute function and find the comment EXECUTE USER OPERATION HERE.
The client.sendUserOperation function will be used to execute the user operation created by the UserOpBuilder. When the User Operation is built it will be displayed in the console, along with the corresponding transaction.
//
// >>>>>>> EXECUTE USER OPERATION HERE <<<<<<<
//

console.log("Generating UserOperation...");
const res = await client.sendUserOperation(
  userOpBuilder.executeBatch(this.calls),
  {
    onBuild: (op) => console.log("Signed UserOperation:", op),
  }
);
console.log(`UserOpHash: ${res.userOpHash}`);

console.log("Waiting for transaction...");
const ev = await res.wait();
if (ev) {
  console.log(`Transaction hash: ${ev.transactionHash}`);
  console.log(
    `https://mumbai.polygonscan.com/tx/${ev.transactionHash}`
  );
}
⑦ Play
Now you're ready to play!
Get water from the bucket, water the garden, and then speak with the scarecrow. In your console you'll see the user operation.
Updated over 1 year ago